How to Install Nginx On Rocky Linux

Author - Sanjay
Introduction
In this tutorial we will have a look at how we can install nging on our new Rocky Linux 8 server. If you are new to Rocky Linux and trying to install Nginx , it could get tricky as it doesnt comes with preloaded nginx in its repo.
Hence we need to install nginx manually on our server. Nginx is an useful tool which can act both s reverse proxy as well as load balancer.
Table of Contents
Pre-Requisistes
A Rocky Linux 8 production server or a Linux VPS . Make sure you do not have Port 80 & PORT 8443 occupied .
Setup Nginx Repository in Rocky Linux 7
In order to setup nginx repository we need to add Rocky Linux repository.
sudo dnf install dnf-utils -yyou can also setup in a different way below manually.
Setup Nginx Repo Manually On ROCKY LINUX
In order to setup manually you can login with root user or any user with which you want your nginx to run .
Create a file nginx.repo in following directory .
$ vi /etc/yum.repos.d/nginx.repolets add the Nginx repository below .
[nginx]
name=nginx repo
baseurl=https://nginx.org/packages/centos/7/$basearch/
gpgcheck=0
enabled=1
Let's add RHEL 7 repository if you have RHEL version .
[nginx]
name=nginx repo
baseurl=https://nginx.org/packages/rhel/7/$basearch/
gpgcheck=0
enabled=1
Installing Nginx On Rocky Linux 8
If you have multiple repo setup you can choose any repo using the command below
sudo yum-config-manager --enable nginxIn our case nginx is the repo name .
Once we have the repository added we can now install nginx using below command .
sudo dnf install nginxNginx will now get installed on your VPS or Server. Next step is verify installation.
Verify Nginx Installation
Now we have installed nginx , next step is to verify if the installation actually works .Let's follow the steps below.
sudo systemctl enable nginx
sudo systemctl start nginx
Above command will register nginx as a systemd service and now we can actually check the status of our service.
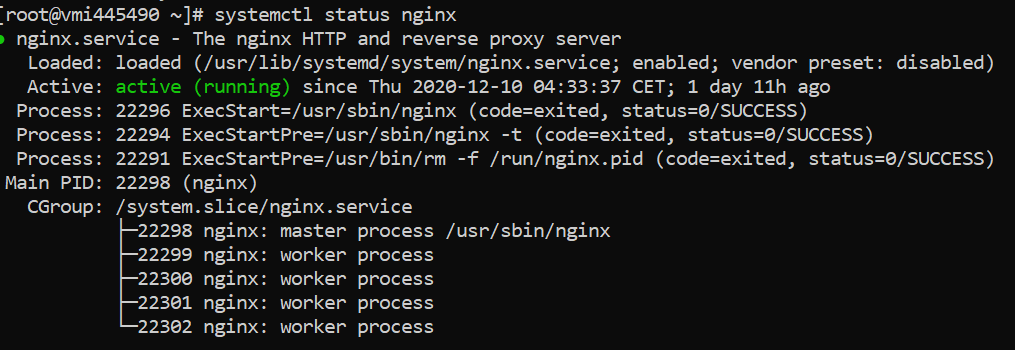
sudo systemctl status nginxOutPut :
Now that your nginx service is up and running , you should be able access it .Although you won't be able to acess it through an IP . let's check few of the configurations if you want nginx access via IP Address.
Setup Firewalld for Nginx
Why do we need to update firewalld configurations ? One of the reason is that your Rocky Linux server will by default block all incoming web traffic due to security reasons .
Firewalld configuration changes to allow HTTP and HTTPS web traffic should be done as using below commands.
sudo firewall-cmd --zone=public --permanent --add-service=http
sudo firewall-cmd --zone=public --permanent --add-service=https
sudo firewall-cmd --reload
Now that you have executed all the above commands successfully , you will be now able to access your Centos7 Nginx home page using your IPAddress.
http://YOUR_IPyou should be able to now see the nginx home page .

Nginx Configurations to Remember
/etc/nginx/nginx.confis the main configuration file for nginx.- In case of an error , navigate to nginx log files inside
/var/log/nginx. You will find two log fileserror.logandaccess.log. - Put all your domains under
/etc/nginx/conf.dcreate a separatedomain.conffiles for all te domain you want to have in your nginx .
Conclusion
Congratulations ! We have installed nginx now successfully . Let us know if you face any issuess during instyallation . We will be happy to help you !! Happy Coding !!