How to Install PhpmyAdmin on Ubuntu 22.10

Author - Sanjay
Introduction
PhpMyAdmin is a free, open source web interface for mysql interface. It's a powerful tool used by many web developers to manage their database in a secure, intuitive way.
In this post we will follow step by step guide to install Phpmyadmin in Ubuntu 22.10 .
Table of Contents
- Introduction
- Pre-Requisistes
- Steps for Installing Phpmyadmin on Ubuntu
- Step 1 - Update the Ubuntu Package manager
- Step 2 - Install Apache in Ubuntu server
- Step 3 - Install php
- Step 4- Install APache
- Step 5 - Install Phpmyadmin
- Step 6 - Install Phpmyadmin in a folder.
- Step 7 - Add Permissions .
- Step 8 - Configure Apache to Use PhpmyAdmin
- Configure Mysql Database with PhpMyadmin
- Conclusion
Pre-Requisistes
A Ubuntu server or a Desktop with root privilages or you can get a free vps hosting from Vultr or DigitalOcean
Get Free Mysql Hosting and VPS Hosting
While many users need the functionality of a database management system like MySQL, they may not feel comfortable interacting with the system solely from the MySQL prompt.
This can be especially true if you’re new to Linux . To overcome this problem, the team behind phpMyAdmin created a web interface for managing their service and it’s freely available and opensource.
Steps for Installing Phpmyadmin on Ubuntu
We are going to install latest version of Phpmyadmin , as you know apt is the repository in ubuntu .All the packages are instaled via apt repository . Hence we will first try installing via apt then we will try other ways .
Lets follow the steps of installing Ubuntu
Step 1 - Update the Ubuntu Package manager
$linuxterminal sudo apt-get update Step 2 - Install Apache in Ubuntu server
thelinuxterminal$$ sudo apt install apache2 wget unzipStep 3 - Install php
Now lets install php along with few mandatory php packages
- php-zip
- php-mbstring
- php-mysql
- php-json
thelinuxterminal$$ sudo apt install php php-zip php-json php-mbstring php-mysqlStep 4- Install APache
In next step we will make enable apache and make sure our apache is running succesfully . If you do not have apache installed follow the step by step guide installing apache .
thelinuxterminal$$ sudo systemctl enable apache2 thelinuxterminal$$ sudo systemctl status apache2 Step 5 - Install Phpmyadmin
Now you we can install the default version of PHP my admin but we are going to get the latest version of PHP my admin from PHP my admin website and then will be able to install it in our Ubuntu 22.10 let's get ahead and install the PHP my admin manually . Make sure you have wget installed .
thelinuxterminal$$ wget https://files.phpmyadmin.net/phpMyAdmin/5.2.0/phpMyAdmin-5.2.0-all-languages.zip thelinuxterminal$$ unzip phpMyAdmin-5.2.0-all-languages.zip Step 6 - Install Phpmyadmin in a folder.
Now if you see PHP my admin will always be installed in /usr/share/phpmyadmin so we will install That downloaded zip in same folder where PSP might gets installed by default .
thelinuxterminal$$ sudo mv phpMyAdmin-5.2.0-all-languages /usr/share/phpmyadmin Step 7 - Add Permissions .
We are going to create a temp directory and provide required permissions to the directory.
thelinuxt$ sudo mkdir /usr/share/phpmyadmin/tmp
thelinuxt$ sudo chown -R www-data:www-data /usr/share/phpmyadmin
thelinuxt$ sudo chmod 777 /usr/share/phpmyadmin/tmp
Step 8 - Configure Apache to Use PhpmyAdmin
We will configure the Apache web server to route all the request to /phpmyadmin to the foder where we have installed phpmyadmin.
Hence we are required to create a configuration file to handle all the request
thelinuxt$$ sudo vim /etc/apache2/conf-available/phpmyadmin.conf Alias /phpmyadmin /usr/share/phpmyadmin
Alias /phpMyAdmin /usr/share/phpmyadmin
<Directory /usr/share/phpmyadmin/>
AddDefaultCharset UTF-8
<IfModule mod_authz_core.c>
<RequireAny>
Require all granted
</RequireAny>
</IfModule>
</Directory>
<Directory /usr/share/phpmyadmin/setup/>
<IfModule mod_authz_core.c>
<RequireAny>
Require all granted
</RequireAny>
</IfModule>
</Directory>Now that we have created our phpmyadmin configuration file we need to enable this configuration and restart the Apache web server
thelinuxt$$ sudo a2enconf phpmyadmin
thelinuxt$$ sudo systemctl restart apache2
lets enable the firewall in order to access phpmyadmin from outside system .
thelinuxt$$ sudo firewall-cmd --permanent --add-service=http
thelinuxt$$ sudo firewall-cmd --reload
Configure Mysql Database with PhpMyadmin
We are going to configure mysql as database .
Now Login to Mysql with password you might have created while installing mysql database . Now enter the password and create a database .
thelinuxterminal$ sudo mysql -u root -pmysql$> CREATE DATABASE thelinuxt;
Query OK, 0 rows affected (0.01 sec)
mysql> CREATE USER 'thelinuxt'@'localhost' IDENTIFIED BY 'Pa$$w0rd';
Query OK, 0 rows affected (0.01 sec)
mysql> GRANT ALL ON thelinuxt.* TO 'thelinuxt'@'localhost';
Query OK, 0 rows affected (0.01 sec)
mysql> FLUSH PRIVILEGES;
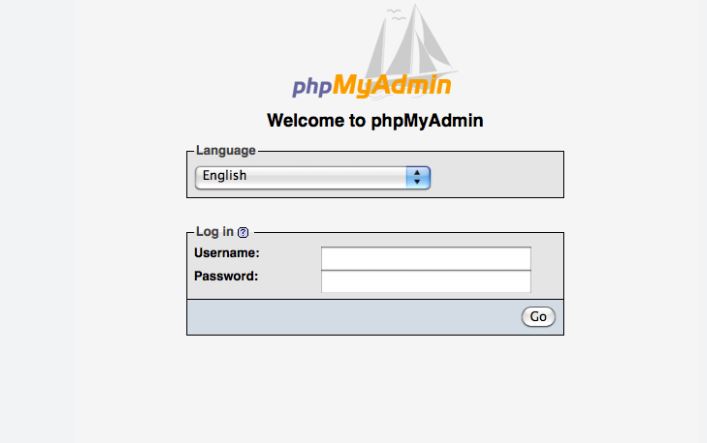
Now lets navigate to the browser and go to http://your_ip/phpmyadmin
Conclusion
Congratutalios ! . We have done phpmyadmin installation on our Ubuntu 22.10 server . We have also seen how we can connect via mysql client and login to phpmyadmin . We have seen how we can install phpmyadmin on ecisting apache server as well .
If you face and difficulty or any problem , let us know on comments.