How to Install NVM In Centos 8

Author - Sanjay
Introduction
Node version manager is a command line utility to manage different versions of node in a system. While doing application development, sometimes we are required to have multiple node versions for different applications running .
Managing multiple node versions for different projects becomes difficult for developers. here comes nvm . The main role of nvm is to manage multiple node versions on a single system and this tutorial will explain you how to install nvm on a centos 7 server.
Table of Contents
Pre-Requisistes
A CentOS/RHEL 7 production server or a Linux VPS .
Also Read
- Grep Command Example Linux
- Secure Your Apache Web Server on UNIX / Linux
- Install and Configure Nginx On Rocky Linux 8
- How to Setup an Amazon LightSail Instance
- How to install Kali Linux on a clean hard drive
Installing NVM on CentOS 8
so nvm is a basic Bash utility which which we are going to install on our Centre system .In order to install nvm , open terminal on your Linux System.
If curl is not installed on your system make sure your install called first as below by executing the following command.
sudo yum install curlso now once you have CURL installed you need to execute the following command which will install NVM on your system.
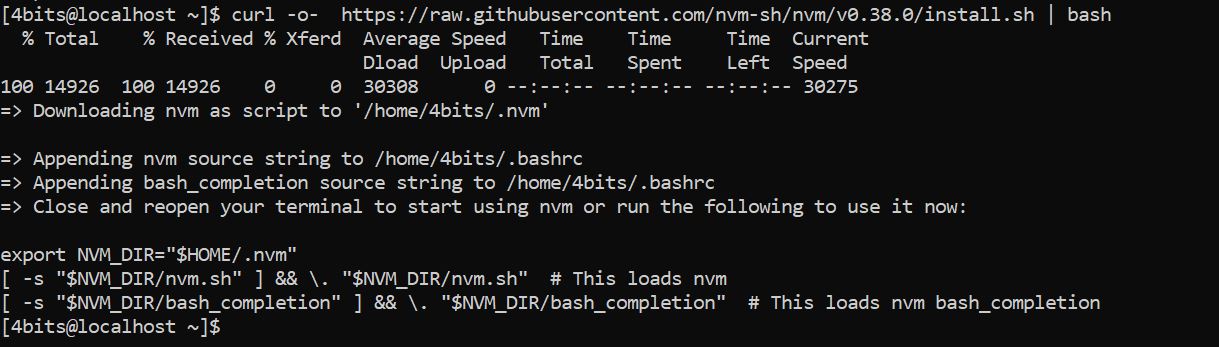
curl -o- https://raw.githubusercontent.com/nvm-sh/nvm/v0.38.0/install.sh | bashOutput :-
Refreshing the Terminal
Once the NVM is installed you can execute nvm --version .
But this will not work immediately you need to refresh the terminal so that the changes can be applied as soon as you have installed NVM .
source ~/.bash_profileAnother alternative would be you can close your terminal and reopen the terminal.
How to Verify NVM installation
We need to verify if NVM has been installed successfully or not , in order to verify you can execute the command below
nvm --versionOutput:-

How to Use Node Versions In NVM
Now we are ready to install node JS in order to install node JS we need to check the list of available node.js versions in nvm.In order to find the list of available node.js versions execute the command below .
nvm ls-remoteInstall Nodejs Using NVM
Now that you have the list of available node.js versions ,we need to choose one of the versions and install node JS. Let's say the latest available stable version for node JS is 14 on the date of writing this article. you can execute the command below
nvm install 14This command will install the latest stable version of 14th release of node JS . in our case the latest stable version is 14.17.1 If you are interested to learn about installing nginx on Centos 8 , follow this post
Verifying the installation
To verify the current installed version of node JS installed through nvm you can execute the command below
nvm currentSwitch NodeJS Version NVM
We can manage multiple version of nodejs usig NVM .Switching between versions becomes easy . In case you are using a latest stable version of nvm use following command
nvm install stableWhile installing the latest stable version , nvm will automatically set the latest stable version as current .
nvm currentConclusion
Nvm makes it effortless for us to switch between nodejs versions . We no more need to switch the installation path in our systems . It automatically sets the classpath and makes a developers life easier . We will keep sharing interesting tools of linux .. Keep Sharing and comment if you have any issues.